Friday, May 14, 2010

Electrical Boxes going in

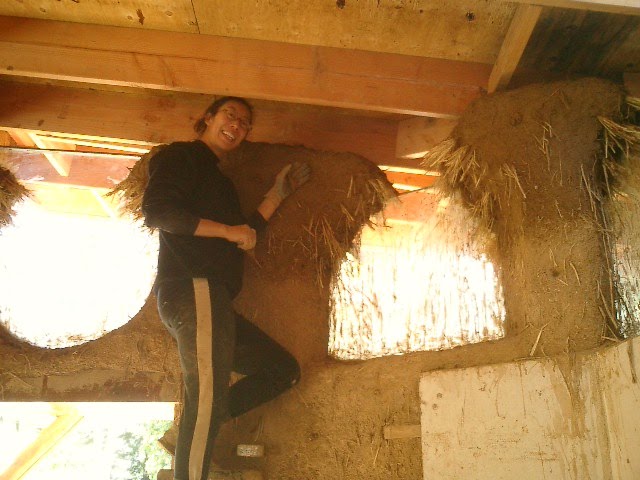
As we're frustrated by the small amount of cob we can put on the walls at a time, we're starting in on the next steps. I've been carving out the holes that will allow the electrical boxes to sit inside (we'll plaster them in once we get the wires attached and poking out the front)

Generally, I take about 10 minutes and a crowbar to make the hole in the wall, but on the living room benches, we thought we'd try and put them in the wet cob. We'll see how this all works out.

Diakon from the garden

As we're learning about better soil amendments, the Japanese radishes are starting to look like the ones from the store. Good stuff!

Wednesday, May 05, 2010

Started the benches!

Since we don't have enough wall left to put 3 batches on, we decided it was time to start in on the living room benches. Here you can see the beginnings. The posts will be the 'stops' for the opening tops.
"flushing dead men"

that sounds creepy, doesn't it? Actually, what I mean is cutting the pieces of wood buried in the wall (called 'deadmen' by us hippy builders) directly flush with the cob wall. Some are just sticking out from something buried in the other side (in the picture, I'm cutting the closet anchors) and some we put there so that we can nail in pictures later.


Friday, April 30, 2010

Spring is for Gardening

Once again, we've attacked one of the terraces of the veg garden, taking lots of 'old' dirt out and adding fresh compost. We also needed to add 'root blockers' at the bottom of the terrace basket, as the surrounding redwoods come in to steal water and soil nutrients through the bottom.

So again, we're using that hardboard stuff that was part of the concrete forms to create a bit of a barrier to keep the roots out. and I thought gophers were going to be the problem! The roots are so bad in some spots, it's hard to put the shovel through them.

Melissa did most of the digging, and it's sticky wet stuff these days. Here she's standing on the bottom of the terrace, with a few hardboard blockers in place, and now the process is to move all that dirt in front of her behind her, and put blockers down as you go. does a good job of aerating the soil, that's for sure.

Thursday, April 29, 2010

Garden Soup

For lunch yesterday, Melissa made a ramen soup with miso and all the veggies were from our garden. Love it!
New Garden experiment

Since once again we need to pull out old soil from our veg garden to be able to add fresh compost (with the terraces we have, we only have so much volume we can handle) we thought we'd try and set up a new shade garden for the summer.

One of the problems we have with gardening is that it get so hot and dry here in the summer, even with tons of watering, delicate plants get fried, or at best, just bolt and go to seed, thinking their done before they start. So, we thought we'd put a terrace in back by the water tanks, in the shade:


We finally found a use for those old 'hardboard' pieces of junk used to make the concrete forms back when we were making the bond beam of the foundation. They're now 'root blockers', keeping the redwoods from coming up through the bottom to get at the nice soil and water.

we threw down some logs and added the dirt excess from the garden (actually, we'll have a ton more to take out yet) I'll post pics of lettuce sometime soon, I hope!

Tuesday, April 27, 2010

Some random progress photos

Melissa goes up and 'thumbs' every layer after it goes on, making sure it gets tied into the previous one. Here she is in the main bedroom, working on the interior wall that separates the living room from that bedroom... you can see the chimney pipe in front of her. Almost there!
We can't remember how, but we broke a dinner plate recently, and since it's ceramic, and won't degrade or anything, we thought we'd just bury it in. Here it is, ready to go in near the loft window - aka the top of the southwest wall:
In between other things, I'm still working on the main bedroom pocket door. Here I am, in strange lighting, cutting the notches in the bottom (or top) of the door that will house the rollerblade wheels this will run on. I finally fixed my Rip framing saw, so I got to use the proper tool on this:

Note we've started making the main bedroom into the carpentry shop, as the walls are done in there, and we don't need to cob in that area anymore, so it's an easy place to work in the shade, or out of the rain, and we don't have to move stuff around.

Thursday, April 22, 2010

Some different progress reports

Here's Melissa 'thumbing' in almost the last bit on the NW wall in the bathroom, between arched windows:

This is me trying to get a piece of 4" rigid foam insulation in between the rafters where the wall comes up to meet it... I had to shave a bit of cob wall to get the insulation to sit right:

Here you can see the outside of the wall above the southern windows... so far. It's just a patchwork of plywood, which will be what we attached lathe to before plastering. It's a wooden wall section that will look as though it's cob when it's done. Notice that we're using all the scraps around the place for this work. No point in worrying about whether the plywood is clean or not, since we're going to slather it with mud later on.


here you can see the wall above the window from the inside. We'll put insulation in that as well, and it will get covered with plywood, then metal lathe, then earthen plaster. Then, probably a book shelf.

Wednesday, April 21, 2010

Different weather, different tasks

it's be a strange week of weather up here. Check out Melissa dressed for cold as she measures out the vertical studs in the window framing area of the front/south wall:


couple days earlier, I was able to mow the grass for the second time this spring in the hot sun:

Wednesday, April 14, 2010

First 'step' in floor

As readers know, we have an earthen subfloor that we've been working on top of for a year now. On top of this will go the radiant tube layer, which will be 1.5 inches thick with the tubes running all through it. On top of that will be a .5 inch finish layer. Thus, we have 2 more inches of floor to go, and we have three levels to work with. So, we need steps between them.

We probably could just create clay floor steps, but the potential for damaging the edges and the lack of visual distinction between levels didn't appeal to us, so we started thinking about a wooden sort of 'retaining wall' for the edges of each level.
This would have to be made of a hard wood, as our redwood supply couldn't take the long term traffic abuse. So, I've made some up out of madrone. (the madrone that hung over the driveway)

Here you can see the different pieces that have been roughly planed and lap jointed to go around the curve of the upper level step.

They will be planed a bit more, and the probably sanded quite a bit, and then glued and screwed together.

Finally, to hold them in place, we'll probably do some glue between wood and cement, but also have nails sticking horizontally into the clay floor behind it, like anchors.

Design Mistakes in my cob house

So, I have long meant to create a list of mistakes I made when designing the finishings on our house.  Now that we've lived in it for a ...