Wednesday, June 30, 2010

Tube layer of floor starting to go in

Starting in the little back corners and using a perlite mix (perlite is a natural lava rock found in California that is super light like styrafoam... it's those white dots in your potting soil) and putting it on areas that *don't* have tubes, as sort of a insulated 'stay cool' area.

Under the future toilet buckets:

and under the kitchen counters:
Those 2x4s getting mudded in will be anchor points for the posts holding up the counters.

Saturday, June 26, 2010

Committing to madrone steps

Well, I know I spent a bunch of time milling, planing, notching and figuring out these madrone steps so that they would be a sort of retaining wall for the clay floor at each level, but I've been worried they would continue to warp and twist, but now we're committing to them.

Part of the idea is that they will match other madrone parts of the house: you can see the end table already built into the end of the bench on the far end of the step, and in the unseen foreground of this picture, there's the bedroom threshold that's also madrone. It's a beautiful hard wood, but it takes so long to dry that it often cracks and warps. ah well, it will match the other 'rustic' parts of the house!
Tubes are In!

The radiant tubes weren't actually that hard to put in. We left them out in the sun for a while, and stretched them completely out straight to take the kinks from the packaging, and then just pulled them in and laid them out.

You can see we simply used slats of wood and screwed directly into the mud sub floor, squeezing the tube a bit to hold it in place. we'll pull those out as we cover it with clay.
It was a little challenging to figure out how to get up the different levels, but we did one level a day, and didn't try and rush it.


We also used buckets filled with stuff to hold down spots as we were working.
Summertime views

we have a really nice flower called 'Farewell to Spring" that blooms nice pink, white and purples.

and now the berries are starting to come in! Breakfast time!

Monday, June 21, 2010

Free labor

A buddy came up over the weekend with his kids for a fun easy camp out for Father's Day. It was great, as they were able to go off on hikes while we were still working on house stuff, and then we could all get together for meals.

I was quick enough to show them how much fun it was to crack acorns, and that seemed to keep the kids busy for quite a while, and we got next week's breakfast food out of it!
Melissa completes the wiring!

Well, pretty much. 11 of the 13 circuits are in, which is as much as can be done until we get some more of the ceiling insulation in and build in the bed (which will have plugs on the side).

Couple other things about our wiring setup: due to potential voltage drop, you're not supposed to have circuits longer than 50 ft on 12 gauge wire... since we had a couple that were close to 60ft, we just upped the gauge on everything; where normally you'd have 14, we put 12, where you would have 12, we put 10, just to have a stronger, more efficient system.
Our neighbor, an electrical engineer and supreme 'figure-it-out-yourself' kind of guy came over yesterday with a 12 volt battery and a light bulb on alligator clips and we checked every circuit for shorts and voltage. We did find one short, and fixed that (too many thick wires jammed into one junction box) but other than that, Melissa had it all correct. woo hoo!

Thursday, June 17, 2010

Some random updates

Did I ever post about my rainwater faucet set up? this hose is attached to a pipe that runs back behind the house to the upper rainwater cachement tank. I get to use 60 gallons a day on the orchard now.

New tomato cage plans (every year I seem to do them different. someday I'll have a real solution) I'm weaving basket like things this year out of hazel. I tie off some of the joints with iris fronds, but the things actually stay together pretty well by themselves. Another tomato note: most of our plants are from my seed saving efforts from last year. Hoping that we get some good tasting, mountain climate ready fruits this year.

Anti bird cages for the strawberries! You can't really see it in this picture, but these frames are covered with the old deer block on all sides, to keep the birds away from the berries. the top section is only stapled on one side, so I can easily peel it off for picking and watering.

Varnish town: population - me. In between different things, we're finding window and door trim pieces and getting them ready to go in. Some are varnished, some are oiled, depending on their placement and potential exposure. Lots more to go!

Monday, June 14, 2010

Melissa continues to Rock the Wires

She's got the whole thing mapped out and figured for I think, 12 circuits throughout the house, with double switches in some places, and everything in parallel, rather than in series, so if one thing screws up, the whole circuit doesn't crash. Pretty competent gal, huh? nice apron too.
Another closet done

The storage closet next to the back door is trimmed out and waiting to get plastered.

Because of the design of the shower - that had to deal with the curve in the walls - we ended up with this little triangle closet space. The horizontal plank on the left will house the heating system wiring. You can see some romax going up there already.

Sunday, June 13, 2010

Friday, June 11, 2010

Electric outlets Springing up

With much planning and not a little arguing, the decisions on where to put lights and outlets are being made, and little blue junction boxes are sprouting up all over the place. (too many places, if you ask me)

We're even putting a few extra in the ceiling, in case the THREE lights in the kitchen and the SEVEN lights in the living room aren't enough. In the photo below, the furthest ones are the two kitchen task lights, and the closer two are fixtures that will be above and on either side of the french doors, for the eating table.


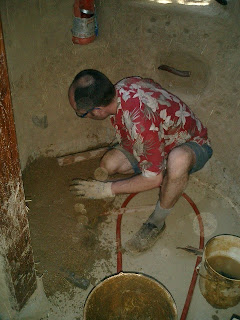
When we put in a switch, the hole gets dug first, then Melissa does the wiring, then I go back and cut a groove for the UF (underground capable) wire so that we won't see it in the finish plaster. Jack is not impressed.

You can see in this photo that I've taken a couple sheet-rock screws and simply drilled them into the cob, on either side of the 10 gauge wire (we decided to make sure we didn't have any efficiency drops, and got a gauge bigger than needed - that's some stout wire!) and then I just took some string and wound it between screws to hold in the wire at spots where it wanted to jump out of the groove:


There's a lot of outlets to go!

Sunday, June 06, 2010

Starting in on the electricity

Since Melissa has taken on the wiring, she's learning about wire strippers and needle-nose pilers, and how hard getting those little screws to grab the wire is to do while reaching under some wall:

We realized that because we're going to put a lot of little circuits through the house (instead of a couple big ones with all outlets on them) we need more space to get the wires out of the house to the circuit box. So our 1 1/4" pipe wouldn't be big enough. So I was charged with getting the pipe out of the wall, so that we could make the hole in the 18" thick wall bigger. not so easy.
After hitting first one end and then the other with a hammer and multiple sticks, I finally managed to grab it with a pair of pliers and slide it out:
It's amazing how solidly it was in the cob, considering how slick and smooth-sided it was. I feel better about the deadmen and posts with nails on them now.
The Building of a Pantry Wall

First, Melissa goes through the lumber pile and picks out decent boards. Then I plane them up with the hand plane:


Then she does all the marking and figuring out where shelves should go:


Then I do the wood removal (sometimes call butchering) of making the notches and fitting the pieces together:


Then, on a hot day, the thing gets assembled. Looks pretty good! (and the shelves aren't bad either!)


Friday, June 04, 2010

Router for Door Handle

Here's my template jig for the router as I was making the first door handle (which is really just a divot in the side of the door) for the bedroom.

it worked out pretty well... though I was pretty nervous about messing things up.

Tuesday, June 01, 2010

Bedroom closet formed in

This is a 'double wide' clothes closet in the main bedroom. there's a shelf behind that horizontal bar (it's plywood with a veneer that matches the inside of the wall that you can see) on the bottom, and a varnished vaneer on the top. We intend to put sliding (?) doors above that for access to the shelf.


the cross piece and the big vertical posts (and the horizontals holding up the shelf inside) are all from the same tree. kind of cool.


it's going to be odd, though, as the ceiling slopes like that, so the doors will have to be pretty short.

Also notice the horizontal 'studs' on the inside of that wood wall (again, plywood that will be plastered, with a veneer inside) we made those nice redwood pieces, so they can be little shelves.

Our neighbors were getting rid of all that veneer, so that's why we're using it; it was free.

Design Mistakes in my cob house

So, I have long meant to create a list of mistakes I made when designing the finishings on our house.  Now that we've lived in it for a ...