Thursday, July 27, 2006

Week 5? connecting the boards


So, this week we used screws and put down the planks of the deck. The difficult part was that we wanted to use these beautiful, thick, long, redwood planks that unfortunately weren't uniform.


we were using pipe clamps to bend some of the warps out of the boards, but as we got further and further along, we needed longer and longer clamps. We found a piece of pipe on the property and it worked great, and then Tys came up with the idea of using chain to get the last bit done.


Melissa did a great job of finding the right board to go next to the right board.


Here they are, all screwed down and ready to sand and treat:

Saturday, July 22, 2006

Week 4: finish platform bracing, then boards go on

As we started adding cross-bracing supports to the beams and posts, we felt the whole thing solidify into a single unit. Each post is attached to its beam(s) by the Y-braces; each post is attached to its neighboring post (around the circle or down the middle) by X-braces. The uppermost and lowermost posts are attached to their nearest centerline posts by V-braces.


We had to add more bark notches in order to attach the cross-bracing more solidly.


We tried laying down a piece of decking lumber across the beams. From the wood we had milled, we got some 20 foot lengths of 1.5" x 12". We're hoping to use these in their entirety. Here's Tys couldn't wait to demonstrate the stability of the set up (and his excellent balance).


We started picking out the best pieces of lumber for the deck to see how they might fit together. Since they're varying widths and some are slightly bowed or whatnot along their length, we have to cut out the straightetst parts, then puzzle them back together with matching widths. It's just like one of those brain teaser puzzles, only bigger.


We started measuring and cutting out the best parts. So when we left for the weekend, we had less but better matched wood on the deck.

Week Three: bolting down the beams:

Once the beams were leveled, we could proceed with bolting them down to the posts. All connections were treated with wood preservative first.

Our plan was to countersink the bolts and washers on the tops of the beams, but we forgot to look for a spoon drill bit that would be big enough to fit our large washers. Instead, Tys made multiple impressions with our largest spoon drill bit so that the washers would fit.


Tys drills in one of the 10 inch bolts.


The cordless drill would give up before the bolt was all the way in, so Melissa helped ratchet the bolts in the rest of the way.


Tys remembered that it requires less force to turn the ratchet as the length of the ratchet handle increases. So, he grabbed one of the adjustable pipe legs of the concrete mixer we borrowed from one of our neighbors and we used that to extend the ratchet handle. This made Melissa's job much easier... She'll just have to find another way to get the bicep workout!

Start of Week 3, Thor comes up for the day:

Our good friend Thor came up to help with Project Leveling for the afternoon. The goal was to make sure all of the beams were totally level, and Thor helped things go MUCH smoother with his good sense and ideas. We leveled 4 of the beams to one another with Thor's help and advice. He stayed for campfire dinner before he had to head home. Then on the following day, we finished the last two beams.

Tys and Thor raise the posts on the J-bolts a bit.


The end of the work day looks much the same as last week, but is significantly improved!

Week 2: notching the beams:

During one of our meal breaks, Tys modified an old stump in our outdoor kitchen using some scrap wood to give us some additional counter space.


Melissa did the measuring and math to calculate where and how big the beam notches should be. We notched the beams with a little circular saw work, then the good old chisel and hammer, so that they would fit snugly over the tops of the posts.


Scout comes down to the work site in the mornings to supervise our work.


Our first beam, which crossed two posts, was perfectly leveled on our first try. What a confidence booster! They weren't all so cooperative, but we got them to match with some work.


At the end of our second week, we got all of the beams notched and in place on top of the posts.

Friday, July 21, 2006

Week 2 : joints and notching:

After much debate, we decided we DID want some sort of metal connection between the concrete footings and the wooden posts... but of course with our bigger than average posts and the fact that they were round meant we couldn't just go out and buy a bunch of them. So we decided we could make our own out of a different sort of 'straight tie'.

Cutting the joint (note the new vice bolted to the tree stump. solid):


(It's weird how a bunch of these pictures look like advertisements for hand tools. DeWalt, yeah!)

Drilling the joint:

We had to make a hole in the middle for the "J" bolt. This is me, drilling through the metal and using a stump for backing:


notching the post:

Melissa and I then used chisels to notch the tops of the posts and the bottoms, so the joints would have a good 'purchase', since we didn't take off the bark on the other parts.


Tys notching with the circular saw:


The J-bolt sticking out of the concrete footing:

This is what we had to connect all the posts to.


We put the joint onto the bottom of the post:


By the end of the week, a few of the beams fit loosely on their posts.


week 1 - Cement:


After getting help from 'Inventor Greg' the week before to auger out the 26 holes that all go about 3 feet down, we started setting up the concrete footings. Here's Melissa's foot next to one of the holes. We're going to leave the cardboard tube in. (some people peel them off I guess).


This cowboy look is for the sun primarily, and the kerchief is so I don't breathe the concrete dust. I'm about to shove a piece of rebar into the wet concrete.


There goes the end of the rebar, which got sunk deeper into the concrete.


A few of the footings with the "J" bolt sticking out, drying in the sun:


Every evening, we cook dinner over the campfire, and actually eat pretty well.


I finally got the power cord up near the tent (all the way from the solar panelled trailer, but ended up using some logs as a desk. This photo is with my phone camera, so it's not so hot, but it's funny:

My first creation for filtering used veggie oil, powered mostly by the sun - thus the black paint on the side of the barrels:
Living in the woods

We're now spending more time in the woods than we are in the City, and so more stuff is getting done out there. I had Melissa take this picture of me so that I could show how much I love my truck, and how much of a redneck I'm becoming:

Friday, July 14, 2006

Water tank goes in:


Inventor Greg helped Tys clear and flatten the spot where the water tank now sits.

5000 gallons, takes about 4 hours to fill it half way with the typical gas-powered generator attached to the pump. It's at the top of the hill, so that there's plenty of water pressure down by the yurt and house.
Container "Joe" (names have been changed to protect the incompetent)

After a number of weeks of trying to coordinate a price and a container (a truck box, like the back of a moving truck) from a local and it never panning out, I saw in the Great Exchange - a low budget classified ad rag - that there was a guy who sold and delivered containers 'anywhere'. I called the number in the ad a number of times, no voicemail, no answering machine... then about 10pm on a Saturday night, the guy called me having used caller ID. I told "Joe" that I wanted to buy an 18 or 20 foot container, and wanted to talk him on Monday about when he could deliver.

Fast forward a month and about 3 calls a week where I learned all about "Joe's" mom, his legal issues, his annoying neighbors, and a lot about the different trucks he owns, and two different times waiting out on the property when he was supposed to show up... to finally having a specific appointment with him. Of course, he wanted to meet out at the property even though all he needed to do was check the road, and see where I wanted to put the container... and he'd been on the road more than twice before... but having me give directions wasn't enough. I had to drive the 70 miles down there to sit in the rain and wait for him to show up about 2 and a half hours late. Oh, and he got lost along the way and I had to drive back down the mountain to get him and drive him back up; while his mother sat in the car half way up, as that's as far as his 91 chevy impala would go.

While certainly an agreeable soul, "Joe" is amazingly long winded, and sort of focused on his own stories. These almost all focus around his trucks, his property that has tons of junk on it, and how hard things are going right now.

I got him to the property just as it was getting too dark to see, and after a few minutes of jumbled talk of swinging the trailer around the tree or over a stump and which would be harder or easier, the price for delivery jumped up $500 and possibly a month or two down the road. Both because of the condition of the road, and/or the new court order he recieved from the county to clean up his property.

I think I'm giving up on the container idea.

Addendum: gave up. Bought a shed at HomeDepot for $1000. Put it together in two afternoons, one with the help of Inventor Greg.
The Truck and Conversion Story:

So for about two weeks in November, I spent time emailing back and forth with a guy in Sacramento who had a truck already converted to veggie oil. I had seen his ad on a website that promoted greasecar conversion kits, and was sold on that kit. We talked price, and time for me to come and take a serious look. Of course, it's about 90 miles away, and I didn't have a car, so I had to figure out how to get there... and I kept putting it off. Suddenly, it was Christmas, then New Year's is coming. I email him about the 2nd of Jan, to say I'm coming on Friday. Wednesday, I get an email from him saying he'd been corresponding with someone else, and they drove through with cash in hand, and bought the truck. Do over.

I do more research, find a guy in SF, try to connect with him.. he moves to LA. I discover Frybrid conversion kits, and start trying to contact the owner of that biz to buy a kit. And, in the meantime, shop for a truck. His website is a bit strange though, and while he has a product page, some things don't have prices, and aren't fully explained.

Going around and around about what sort of truck, test driving different ones, trying to figure how old one could get, how much work they might need, how big they are, how many miles is too many... I finally find a kid in Santa Cruz who wants to sell. When I tell him I'll take it, he drives up the next day, creating a scramble for me to have enough money ready for him.
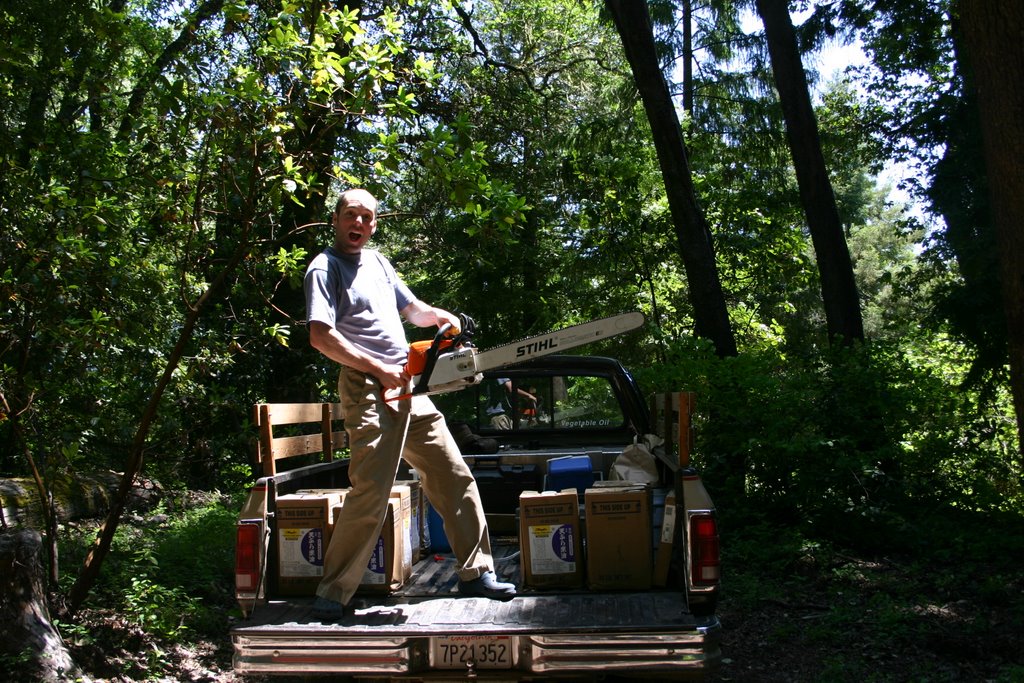
So now I own a 1991 Dodge Ram Turbo. Back to the Frybrid website, and their discussion forum and order page. Reading more posts by customers and would-be customers, it becomes apparent that the owner of Frybrid is not a business man. He can't ship things on time, can't answer questions, do rebates, or follow-through. Apparently it's a great product, but after repeated emails and postings to the discussion forum, I finally get an answer: he doesn't like to sell his kits to Dodge people. It hasn't been fully tested. Funny how I had asked him more than once about what type of truck I should get.

While I'm posting angered WTF posts about this run-around, I get an email from a guy in Berkeley who sells kits. Plantdrive has a good kit, and I can save shipping by just driving over. Done. It only takes two weeks. Then I find out the conversion process is probably over my head, and even includes buying more parts than are in the kit.

This realization knocks the wind out of me for a whole day. Plantdrive charges $2500 to do the install. That's on top of $2700 for (almost all) the parts. oof.

Now I've got all the parts stashed up at Kelly's garage, waiting to see what I can accomplish before giving up and going back to Plantdrive with my hat in my hand.

Addendum: Found a guy (William) on craigslist offering peanut oil, we got to talking, I told him I was looking for a mechanic, and he helped me put the kit in (at $25 an hour) ended up being $800.

Addendum to the addendum: truck runs great. I love getting fuel for free.
So, to make this somewhat chronological, and perhaps to put markers out where we can then go back and fill in details, I thought I'd start with a batch of early pictures and headlines.

This is a view looking SE from the main 'meadow', on a foggy day:

This is our truck, sitting in the meadow, looking NW:


This is looking down our 'driveway' looking west:

...and now, to the chainsaws. With my new sawmill and need to take some trees out where we're going to put the yurt, I now own two saws. One big one, one normal sized one. This is the big one:

and this is what the wood looks like coming off the sawmil:

Mike came out and helped set up the solar power trailer. We're good to go! Mike also helped take down a few trees in the spot for the yurt, as well as give some safety lessons for chainsaw use.

Design Mistakes in my cob house

So, I have long meant to create a list of mistakes I made when designing the finishings on our house.  Now that we've lived in it for a ...