Sunday, September 05, 2010

Next Chapter! Interior Plastering

We finally started on the interior plastering, and man is it great to get back to working with mud. It always feels great to start a new part of the project, and this plastering is the stuff that starts covering up the mistakes and making things look better. We started in the kitchen, as we wanted to practice where it won't be seen; behind the kitchen cabinets. We only went up as high as our shoulders on the first day:

(I think the camera is dying) Here's the first plaster the next morning, already drying quite a bit.

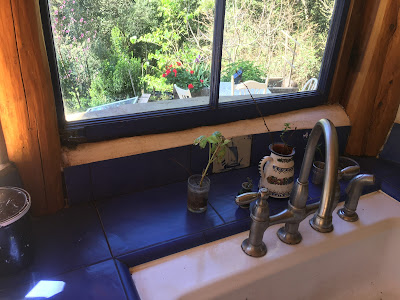
this is the best looking new section (so far) and while the photo doesn't show it well, it does look better than before. You can also see here where we've filled in below the windows, which will be the 'back splash' of the counters.

Monday, August 30, 2010

More on the ceiling

The reed fencing is starting to cover up the different parts of the ceiling. Here's some of the main bedroom, with the skylight trim already on. (I've decided we're going to need another bigger piece at each end, to fix those corners)


and this is a sort of skewed view of the 'mudroom' hallway ceiling. you can also see into the bathroom. Notice how one of the bathroom skylights is covered up - that's to keep it cooler while we're working right there.

Milled some wood

man, that tires you out! These are the future trim pieces for the ceiling. All from one old log.

Friday, August 27, 2010

Ceiling getting done

First, we're putting up butcher paper to cover up the insulation labels:

Then we're putting up the reed mats/fencing:

I'll cut the openings for the skylights when we get them good and attached. I think it's going to look good!

Tuesday, August 24, 2010

Little phone-made video of the front of the house

with the windows in. Left them dirty, as they're going to get muddy with plaster later.

Saturday, August 21, 2010

Filling in the edges

now that the insulation is all in, we're going back and adding a little cob to the tops of the walls, where there were gaps.

It's actually great to be working with mud again, and it looks great when we're done. Almost ready to start on ceilings!

Thursday, August 19, 2010

Details and Celebrations

Here's some photos of stuff that's going on around here while we prep for interior plastering.

A close up of the kitchen window (the one that opens) shows how I had to shim the heck out of the thing, and then cut a piece off of the window itself to make it into the hinge side. Here you can see the different blocks/shims, with insulating foam around it. This will get trimmed with varnished redwood on both sides.

This is Melissa celebrating the last piece of rigid insulation going into the ceiling. She did the whole thing. What a project!

Earlier today she was re-grouting the slate windowsill pieces that had to be replaced after I dropped a 2x4 on them and cracked them off.

Saturday, August 14, 2010

Sweets, there and back

We've returned from our Northern pilgrimage, and have some sweet stuff to show for it. Found two beautiful peaches on our tree here in the meadow, ready to eat:


And Melissa has unpacked her honey haul, which includes gifts from friends and store bought finds along the way. We also saw the local beekeeper on the road to our place, and he gave us a jar as well. (Upper right corner)

Thursday, August 05, 2010

First Windows On! (and some other stuff)

So, the paint is finally dry and the tape is off, and the walls were ready for the first windows. We have to get them in before the indoor plastering, as we want to plaster in the bottoms (inside) to make a seamless edge by the bench. Anyway, it looks like progress!

Further prep for plastering includes putting lath on all the wood surfaces we intend to cover with plaster. the photo below is of the section above the southern windows (pictured above). Both sides of this wall will get plastered, along with the bedroom wall (with the pocket door) and the clearstory, inside and out. This metal lath costs about $8 a 6x2 sheet. I bet we use 20 sheets.

Something was going wrong with the digital camera and it took this 1970s fade shot of Melissa checking the solar oven. Doesn't this just look like a Mother Earth News article photo?

Sunday, August 01, 2010

Finding wood within

Fired up the mill again yesterday... using some of the logs pictured here on the left, I started making some pieces of lumber (you can see one sort of finished on the top of the mill)

...that got turned into door trim. These aren't totally sanded or oiled yet, but at least something got accomplished today. The scooped out area is so you can reach the handle of the pocket door.
Random stuff getting done

Did I mention I put a new hose riser in over by the earth oven? now we have running water for the outdoor kitchen area. I contemplated an actual sink... but who needs a sink?

Some dirty old work socks got washed and hung up on the 'solar powered clothes dryer'


Design Mistakes in my cob house

So, I have long meant to create a list of mistakes I made when designing the finishings on our house.  Now that we've lived in it for a ...