So, I have long meant to create a list of mistakes I made when designing the finishings on our house. Now that we've lived in it for a dozen years, there's some obvious things I wish I'd done different. I hope that future builders take some of these things into consideration.
1. Using Cob at flat and/or moving areas.
This is probably the main theme on all these mistakes. In a number of places, I put cob/earthen plaster at spots that get a lot of traffic or where moving things come in contact AND/OR where it was flat and thus where dust and dirt can settle.
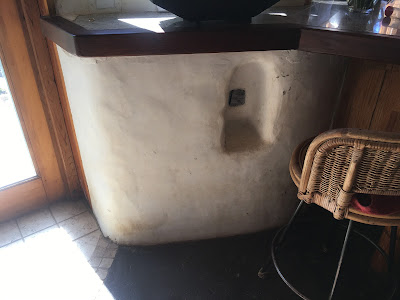
This windowsill behind the kitchen sink is a great example. See the white plaster right between the tiles and the window? See the little gouge on the left where the handle of the window hits the plaster?
This high traffic spot (obviously, kitchen sink is used constantly) has splashes and dust - coming from inside and outside. Should NOT have tried to have that be white. Should have just put in tile right to the window.

2. Flat, white, earthen plaster surface where a window gets opened and closed.
Same as above - stupid to have earthen plaster meet a moving part. I just didn't realize that the plaster would come off like that. My romantic view of cob at the time being able to shape to whatever I wanted overwhelmed common sense. These bathroom windows are right by the toilet. Again, high traffic spot that collects dust. Had to make a rule that the kid couldn't climb in and out of this window because it was beating up the plaster.

3. Nooks with plaster 'floors'.
This whole section is a disaster. Besides the house settling a bit, making a crack where the floor meets the wall (which I couldn't have predicted) the stool is a favorite spot for the kid and visitors, so the wall gets dinged all the time, chipping the plaster.
You can see the dark redwood 'bumper' on the edge of the counter - I actually put that in years later because I had just a smooth curved bit of plaster meeting the granite countertop. SUPER stupid to have just plaster on an edge where traffic can smash it up. DON'T have earthen plaster at high traffic edges!
The biggest problem in this photo is the little candle nook (which we've had a candle burn in there exactly once in a decade) but the fact that this nook is ALL plaster, so that the 'floor' of the nook is both a dust collector and a *foothold* for the kid. Ridiculously bad design that could have easily been made great by having a chunk of granite in there for the floor/shelve of the nook. Granite is super easy to clean, doesn't ding, and super easy to put in and plaster around *when building*. Much harder to do after the fact. Again, don't have white, plaster, flat surfaces.
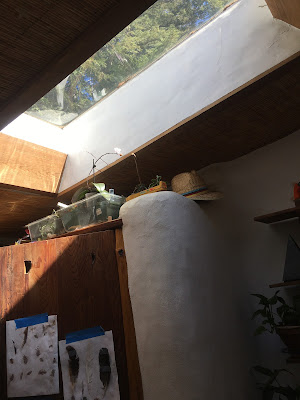
4. Wall that doesn't go all the way up.
Same theme - white earthen plaster flat surface for dust to collect. And this one is up at the top of a closet, that never gets cleaned. Stupid. We didn't really think about the placement of the skylight compared to the needs of the closet wall. Would have been hard to predict and design for, but again, the better solution would have been to drop a chunk of granite on the top of this wall. easy to clean, easy to install.
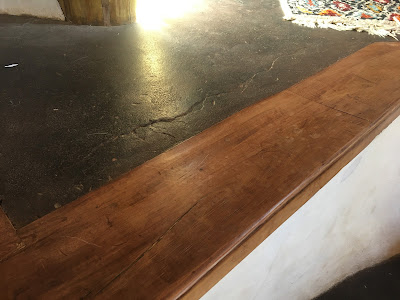
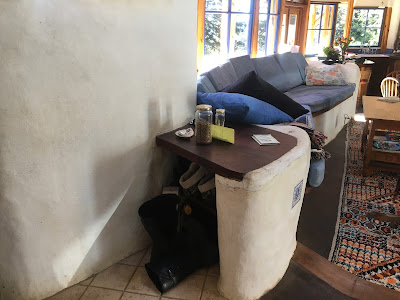
5. Plaster at high traffic edge meeting different material.
If you look at this end table built into the end of the built in couch, it looks like a classic cob house feature. Same stupid problem. Worse, I actually have replaced that wooden top after the fact - the original wood had bugs in it! What I should have done when I did that was to have the wood go further out OVER the cob wall, so that the wood hung over and protected the edge. At some point, I might still do that, even leaving this wood in place. But this wood is really good looking, so it's hard to cover it up.
We have split level floors, and so there's steps and short 'walls' between levels which are topped with madrone wood. Underneath this plaster, there's stone walls holding in the upper level - like a terrace. Stupidly, when I was putting on these wooden pieces, I didn't want to use some fancy chemical glue to fasten the wood down to the stone. (I'm too 'all natural' for that! I thought to myself) and so I used mud and had nails and screws going into the back sides of the wood. Well, of course they get traffic, and they move a bit. Thus, the floor behind them doesn't flex as much as they do, creating cracks. Advice: don't have edges on your floor. if you do, use good glue to hold them down.